Sunday, December 26, 2010

Nagoya style sesame chicken


When you travel to other cities in Japan, you will find various local dishes. There is this famous dish called Tebasaki (chicken wings) in Nagoya, which is located in the middle of Japan. Unfortunately I was not able to try it when I traveled to Nagoya several years ago as I was busy for trying another dishes, but here is the recipe so you can make it at home or wherever you are!

I made this for our family Christmas this year. I used boneless and skinless chicken thighs instead of chicken wings. It will be easier to eat but you could make it either way.

Serve 4 to 5
Total time: about 20 min
  • 2 lbs of boneless and skinless chicken thighs (or chicken wings) cut into bite size pieces
  • Flour to coat the chicken
  • Oil for deep frying

    [Sauce]
  • 1/4 cup of brown sugar
  • 3 tablespoons and 1 teaspoon of Mirin
  • 3 tablespoons and 1 teaspoon of Sake
  • 3 tablespoons and 1 teaspoon of Soy sauce
  • 2 tablespoons of white sesame
  • 1 teaspoon of grated garlic
  • 1 teaspoon of black pepper
1. Combine the ingredients of the sauce in a large bowl.


2. Coat the chicken evenly with flour.


3. Pour at least 2-inches vegetable oil in deep skillet or wok. Heat oil over medium heat. (Drop a bit of batter or a small chicken piece into hot oil. If batter or a chicken piece rises to surface immediately, oil is ready for frying.) Slide the chicken gently into hot oil. Fry the chicken for about 6 or 7 min.


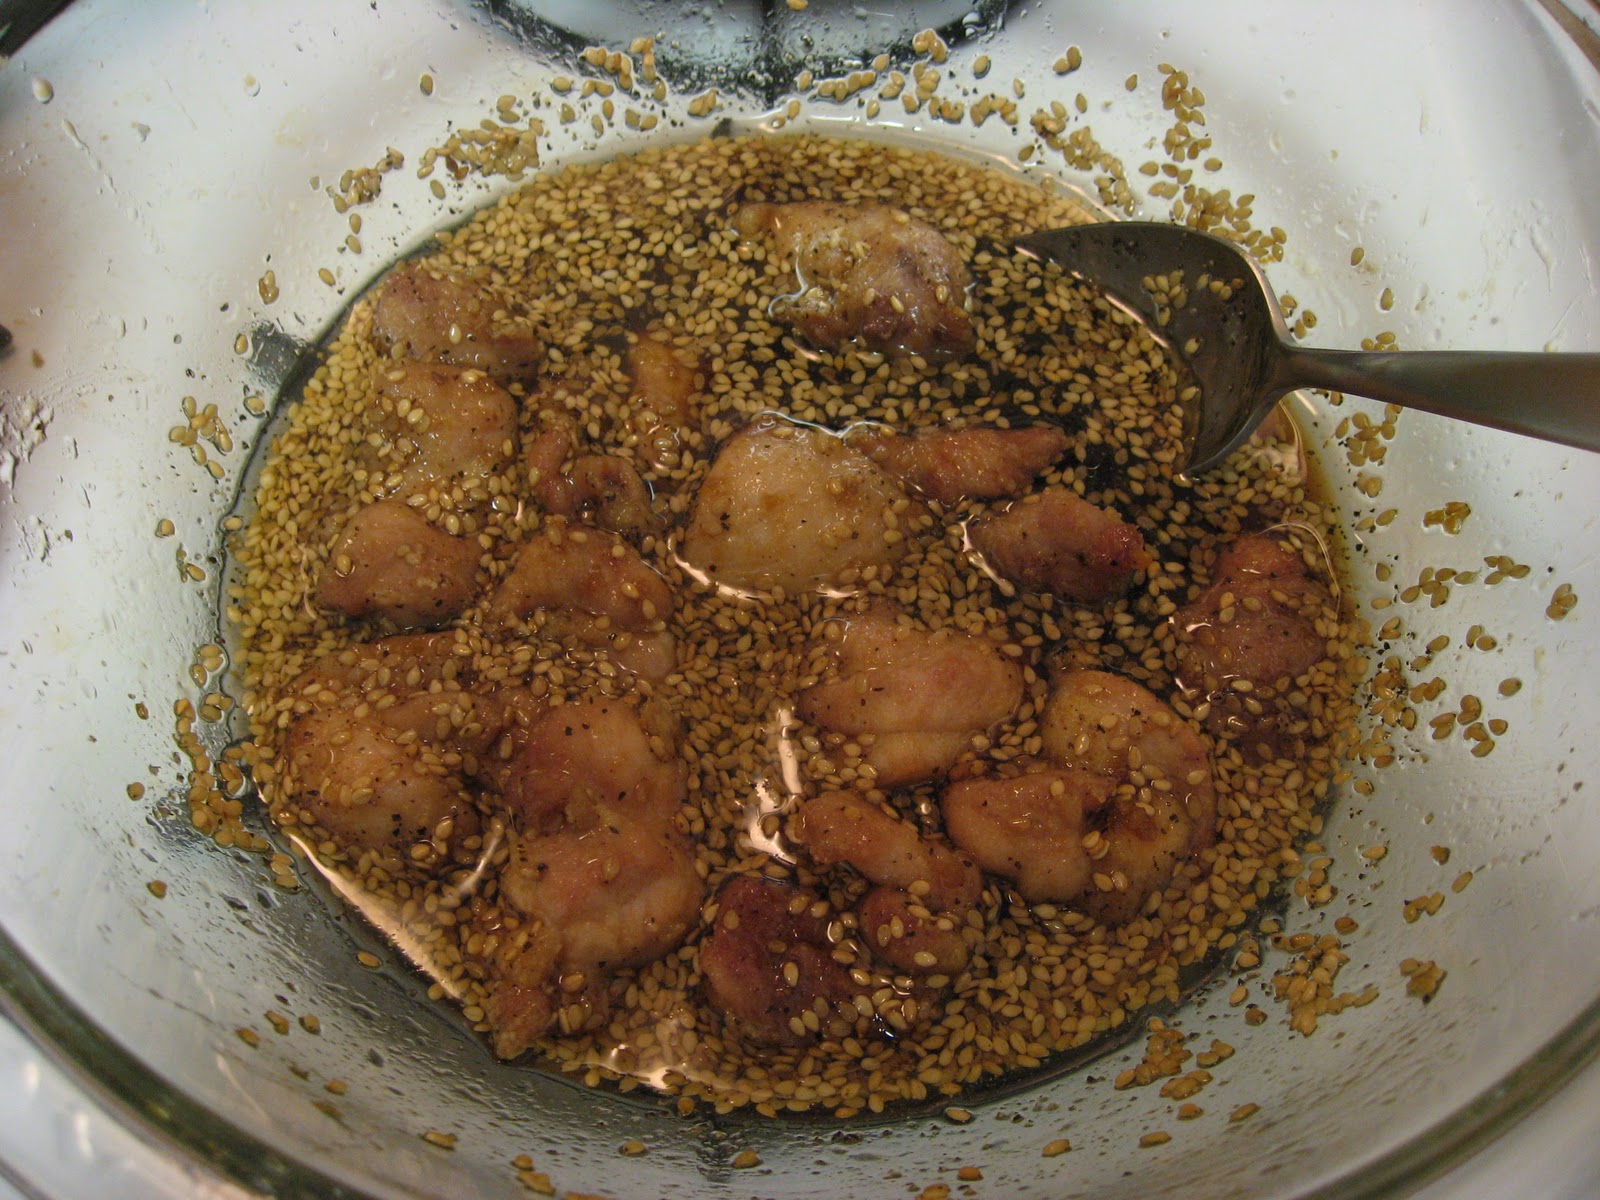
4. Transfer the chicken into the sauce bowl and soak it well. Repeat 3 and 4 until all the chicken for the meal has been fried and soaked in the sauce.


5. Enjoy while it's hot! Add some black pepper or Shichimi Togarashi (Assorted chili pepper) if you like it spicier.


$ Approximate budget I spent for this recipe (excludes seasonings) $
  • 2 lbs of boneless and skinless chicken thighs  : $2.98 ($1.49/lb at Sprouts*)
    -------------------------------------------------------------------------------
    Total                                                            : $2.98
* Price effective thru Dec. 22, 2010 at Sprouts

Friday, December 10, 2010

Avocado Tempura


When I ate avocado for the first time, I was only 13 years old. My cousin, who had eaten avocado while he was in the US to study abroad, bought it at a supermarket that had rare fruits and vegetables. He brought it to my family to let us try. He told me it was sort of a fruit so I expected it to be sweet or tart, but he recommended to eat it with soy sauce and wasabi. As I expected, it tasted...weird, buttery and tasteless. My first try was not so good. However, after several years from the experience, I heard that Avocado was very nutritious so I tried it again. By that time, avocado was getting more and more popular in Japan and was known as a kind of vegetable. Still, eating avocado with soy sauce and wasabi is the most popular way to eat because people say it tastes just like Sushi of Tuna or Toro (fatty tuna which is very expensive). This time, I decided to think it was like a vegetable or maybe sushi instead. It was a good idea. Since then, I've loved it so much!

The other popular way of eating avocado in Japan is tempura style, which is also good. I recommend avocado tempura when the avocado is still a little firm. By heating it up, it gets a little softer. As you can also eat fresh avocado, you will not need to fry it long or need to use a lot of oil.

Serve 2
Total time: about 20 min
1. Halve the avocados and slice each half lengthwise into 4 to 6 slices.


2. I usually use this Shirakiku TEMPURA Batter mix to make tempura. You could also make tempura as directed in the back side of the package.


Pour ice water into a bowl and sprinkle in the Tempura batter mix. Then, stir quickly with chopsticks or a fork making sure not to beat. The batter should be thin and lumpy so that the tempura will be crunchy.


3. Add avocado into the bowl and coat it with the batter gently.


4. Add about 2 tbsp of oil in a skillet and cook the avocado in hot oil over medium heat until the bottom gets crispy.


5. Flip over the avocado and cook until the batter gets crispy.


6. Done! Remove the avocado tempura from the pan and place it on a paper towel to absorb the excess oil.

Tips to make a crunchy tempura are to use ice water, to prepare the tempura batter just before cooking and not to beat when making the batter.
I eat this avocado tempura with soy sauce, ponzu (citrus-based sauce), or salt.

If you still have the batter left, I recommend you to use it for any other vegetables such as slices of onion, carrots, green peppers, or maybe for shrimp. Making tempura at home is not as hard as you think if you have tempura batter mix.

Tuesday, November 9, 2010

Broccori and Shrimp with Thick Sauce


I always care about color scheme in food. I want there to be red (or orange), yellow, and green colors in the meal because these colors will give an edge to your appetite and look gorgeous as well. So, I love the great combination and color of Broccoli and Shrimp. Also, it will warm you up since it has ginger. If you are not used to the spiciness of ginger, you could cut it out or use less ginger than directed in the recipe below.

Serve 2
Total time: about 20 min
  • 1/2 lbs of broccoli
  • 1/3 lbs (or as much as you like) of shrimp
  • 1 ginger clove, minced
  • A dash of salt and pepper
  • 1 tablespoon of sesame oil
  • 1 tablespoon cornstarch (or potato starch)
  • 2 tablespoons of the water
  • 1 teaspoon of sake for shrimp
    [Sauce]
  • 1 teaspoon of seasoning paste or asian chicken broth powder
  • 1 tablespoon of sake
  • 200ml (about 1 cup) of  water
1. Cut the broccoli into bite-size chunks. Remove the shells from all the shrimp and season with 1 teaspoon of sake. 


2. Boil the broccoli for about 2 min. (Or, you could microwave it for 1 min.)


3. In a medium pan, cook and stir ginger in hot oil over medium heat for 15 seconds. Add shrimp and cook.


4. Add the sauce and bring it to a boil.


5. Add the broccoli. Cook it for about 2 to 3 min or until it gets the firmness you desire. Add salt and pepper.


6. In a separate small bowl, dissolve the cornstarch in 2 tablespoons of the water. (Please do this right before the next step because it will separate over time.)


7. Reduce heat to low and add the cornstarch dissolved water over the broccoli and shrimp. Cook and stir for about 1 minute more.

8. Done


For the pork bowl recipe, go to this page.

Pork Bowl with Onion


This is quite easy to make. We love it so much that I always regret not having made more for leftovers. If you love pork, you've got to try it! As for rice, I usually cook more rice than needed for a meal, then divide it into meal-size portions. I store the cooked rice in an airtight container in the freezer so that I can eat rice whenever I want to.  

Serve 2
Total time: about 20 min (If you cook rice by rice cooker, it will take about 40 min depending on how fast it cooks.)
  • 0.6lbs(300g) to 1 lbs of pork boneless country-style ribs
  • 1/2 to 1 onion
  • 1 and 1/2 tablespoon of soy sauce
  • 1 tablespoon of brown sugar
  • 1/2 teaspoon of dashi powder (Bonito Fish Soup Stock)
  • 1 tablespoon of cooking sake
  • 1/2 tablespoon of mirin (Sweet Cooking Rice Wine)
  • 2 cups of cooked rice
    - Optional -
  • Green onion for topping
  • A pinch of pepper
1. Cut the pork into bite-size chunks. Cut the onion in half in lengthwise sections and slice thinly.


2. In a skillet, cook the pork in hot oil over medium heat for about 3 to 4 min.


3. Flip over the pork and cook until it is no longer pink.


4. Add the sliced onion. Cook and stir it for about 2 minutes or until tender.


5. Add sugar, mirin, sake, dashi powder, and soy sauce.


6. Cook and stir until the sauce is almost gone. Add the green onion for topping and pepper if you like.

7. Done! Serve it over the steamed rice.


For the Broccori and Shrimp with Thick Sauce recipe, go to this page.
 

Sunday, November 7, 2010

Japanese Curry


Good things about curry are that it's super easy to make and you could add anything you like to curry. You could add tomato and eggplant as summer curry, or shrimp and scallop as seafood curry, or chicken, pork, mushroom, peas, okra...anything! One time I added a can of tuna because I wanted my husband to eat tuna to take in more protein. He likes curry, but he doesn't like tuna. Of course, I also added other vegetables such as potato and carrots. I was so glad he didn't notice there was tuna in curry. So, you could try to add any vegetables that your spouse or kids don't like if you chop them into small pieces : ). We don't want to force them, but we want them to enjoy meals and be healthier, right? In fact, according to researches curry is known to have many health benefits. It has many spices that help liver function, antioxidants, appetite improvement, diet, etc.. We should all eat it more often.

First of all, you could get a package of curry at a Japanese supermarket or online. You will find many varieties of curry. Basically there are 4 levels of spiciness; Mild, Medium hot, Hot, and Extra Hot. Although the Extra Hot is not common to find. If you have never tried any of these before, I would suggest to try no hotter than Medium hot until you know which level of spice you prefer. There are several brands of curry. You are most likely to find "S&B" and "House". They are both good, but I like the S&B brand. They are originally a company for spices and their curry has deep and rich spices. If you mix curry with other brands, it is very good as well. When you get a package, it comes with 2 curry roux, (containers that hold the curry). I used one of them for the following recipe.

Serve 3 to 4
Total time: about 45 min
  • 2 pieces (or 1/2 lbs) of boneless skinless chicken thigh
  • 1 onion
  • 1 carrot
  • 1 and 1/3 cup of broccoli (I use the stem as well after peeling the hard skin)
  • 1 garlic cloves, minced
  • 3 cups (750ml) of  water
  • 1/4 lb (1/2 package) of Japanese curry roux
    - Optional -
  • 1 potato
1. Cut vegetables into bite-size pieces.


2. In a large deep skillet, cook and stir garlic in hot oil over medium heat for 20 seconds. Add onion and cook until tender. (You could also cook minced onion until light brown. Some people do this for about an hour! This will give you a sweet and rich flavor in the curry.)

3. Add chicken and cook until it is no longer pink.

4. Add the vegetables into a skillet and stir it well. (I usually start adding the big chunks of vegetables first, such as potato and carrots that need to be cooked longer. Then add the other vegetables which will be cooked faster, such as the floret of broccoli or the tomato.)


5. Add water into a skillet and bring it to a boil.


6. Turn down the heat to a medium-low heat. Skim off the scum while simmering the ingredients for 20 minutes.

7. Turn off the heat. Add the curry roux and dissolve it completely.


8. Turn on the heat again with a low heat. Simmer for at least 5 minutes and mix it sometimes so it won't get burnt at the bottom. 


9. Done! Serve it with rice, bread, or naan bread.

If you add a potato, it tends to spoil rapidly in a hot weather like summer. I'd recommend to save leftovers in a container, such as a Tupperware, and store it in the refrigerator.
It is so good as well if you add cheese as a topping on the curry. We also serve curry over Udon noodles. They are really good!

Saturday, November 6, 2010

Tender chicken with vinegar


This is the second time for me to cook this meal. Of course, my husband and I liked it a lot.
Sometimes, chicken breast can be dry depending on how you cook. I prefer chicken breast when it is tender. By marinating with vinegar, it gets really tender but it doesn't get too sour. You will enjoy the texture, it's just like when you eat chicken nuggets. Plus, it doesn't have a strong flavor so we can't stop eating it.

Serve 2 to 3
Total time: about 45 min (including marinating)
  • 2 pieces of boneless skinless chicken breast
  • 2 to 3 tablespoons of flour
    [Marinating sauce]
  • 2 teaspoons of vinegar (I use distilled white vinegar)
  • 2 teaspoons of cooking sake
  • A pinch of salt and pepper
1. Slice chicken into half inch or bite size pieces. Put it in a small bag like a Ziploc bag. (I usually buy a lot of chicken when it is on sale, then chop meat and put them in bags for a portion of meal and freeze them. Sometimes I keep using the bag until when I need for marinating or seasoning. A quart size bag is the best one for the two of us for a meal.)

2. Put vinegar, sake, salt, and pepper in the bag, and set aside in the refrigerator for more than 30 min. (You could start making something while marinating. I made vegetable stir-fry and miso soup in this period.)


3. Put flour in the bag and knead the bag gently to coat the chicken evenly with flour.


4. In a skillet, cook the chicken in hot oil over medium heat for about 3 to 4 min.


5. Flip over the chicken and cook until it gets light brown on both sides.


6. Done!

I think this can be a good appetizer or snack. It will be delicious if you put Yuzu Kosho on the chicken. 
If you do up to step 2, you could freeze it to save for a later meal. Thaw it in the refrigerator before going to work in the morning and all you will have to do is cook it when you return from work. It will save you the preparation time.